
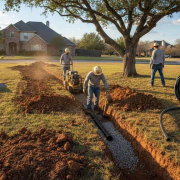
outdoor drainage not a DIY project

Why Outdoor Drainage Is Not a DIY Project

Outdoor drainage is an engineering problem with multiple interdependent variables, and a mistake in any one of them redirects water toward your foundation instead of away from it. In Austin, where clay soils hold water against foundation walls for days after a storm, a failed DIY drainage attempt can turn a $1,500 professional installation into an $8,000 to $15,000 foundation repair.

What Makes Outdoor Drainage So Difficult to Get Right?

Drainage is a multi-variable engineering problem. The slope of the pipe, the composition of the soil, the pipe size and material, trench depth, and discharge location all have to work together. Get one wrong and the system either fails to move water or redirects it toward your foundation.

In Austin, the difficulty is compounded by geology. The city sits on a fault line between two completely different soil types: Blackland Prairie clay east of I-35 and Edwards Plateau limestone to the west. Add the Austin Watershed Protection Department’s rules on where drainage can legally discharge, and you have a set of local constraints that most online DIY guides were never written to address.

Why Is Proper Slope So Critical for Drainage Systems?

Proper slope is critical because a drainage system that does not maintain a consistent 1% grade minimum, one inch of drop for every eight feet of run, will pool water inside the pipe rather than move it to the discharge point.

When slope is insufficient, water enters the perforated pipe and stops moving. The pipe fills with standing water, saturating the surrounding soil and holding moisture against exactly the structures the system was meant to protect. Standing water inside a buried pipe is invisible from the surface, which means you often don’t realize the system has failed until the damage is already done.

Excessive slope creates the opposite problem. When slope is too steep, water exits the discharge point at high velocity, causing erosion at the outlet and putting stress on pipe joints over time. Achieving consistent slope requires a laser level or transit, not a visual estimate.

Why Pick Sprinkler & Landscape Medics as Your Drainage Contractor in Austin?

We’re an NDS-Certified Contractor, which means every system we design and install is built to manufacturer specifications using the right components for each application — including NDS EZ-Drain, which integrates drainage pipe with a pre-wrapped gravel sock and eliminates one of the most common installation errors. We handle both drainage and irrigation, so we know exactly where your sprinkler lines run before the first trench is opened.

  1. Veteran-owned and operated, Marine-founded, with veterans on staff
  2. NDS-Certified Contractor for drainage and water management
  3. More than 1,000 homes served across the Greater Austin metro
  4. 4.9-star Google rating with over 147 reviews
  5. Free installation estimates

We serve homeowners across Travis County and Williamson County, including Cedar Park, Georgetown, Round Rock, Pflugerville, Leander, Hutto, Manor, Liberty Hill, Taylor, and Jarrell.

Common DIY Drainage Mistakes That Make Problems Worse

Industry data shows that 85% of DIY French drains underperform or fail outright. A homeowner spends $500 to $1,500 on materials, the system fails within one or two seasons, and a professional is called in to remove it and install a correct system at a cost of $3,000 to $5,000. A professional installation done right the first time costs $1,500 to $5,000 and lasts 20 to 40 years.

  • Using cheap corrugated pipe: The flexible corrugated tubing sold at home improvement stores is not designed for the soil pressure or water volume of a proper drainage system. It collapses under load, clogs with sediment within months, and holds standing water that becomes a mosquito breeding ground beneath the surface.
  • Getting the slope wrong: A trench that is even slightly off from the 1% minimum grade will pool water inside the pipe, saturating the surrounding soil rather than moving water away from it.
  • Discharging water illegally: Under Austin Watershed Protection Department rules, drainage cannot discharge onto a neighbor’s property or into the street without proper storm easement access. Homeowners who route discharge incorrectly face fines and liability for damage to neighboring properties.
  • Ignoring Austin’s clay soil: A trench dug in Blackland Prairie clay without a correctly sloped system and proper pipe fills with water that cannot percolate. The trench becomes a trough that holds water against the foundation rather than moving it away.
  • Skipping landscape fabric and gravel bedding: Without proper filter fabric and drainage gravel surrounding the perforated pipe, sediment infiltrates the system and clogs it within the first season, often without any visible surface sign until water is already backing up.

What a Professional Drainage Installation Actually Involves

The process follows a defined sequence:

  1. System inspection and water flow assessment: Observe and map how water moves across the property, identifying pooling zones, flow paths, and proximity to the foundation
  2. Soil analysis: Determine clay content, compaction, and permeability
  3. Property grading evaluation: Use a laser level or transit to establish precise elevation data and determine the correct slope and discharge path
  4. Drainage system design: Select the appropriate system type based on site-specific water volume and soil conditions
  5. Material selection: Specify NDS drainage pipe, gravel, landscape fabric, and basin components rated for the specific installation
  6. Excavation: Trench to the correct depth, locate all utility lines before breaking ground, and protect existing irrigation lines throughout
  7. Installation: Set pipe at correct slope, connect all components, and wrap in filter fabric with proper gravel bedding
  8. Integration with gutters and irrigation: Connect gutter downspout extensions and verify the layout does not conflict with existing irrigation zones
  9. Backfill, grading, and landscape restoration: Restore the yard to grade and reinstall disturbed turf
  10. Post-installation testing: Run water through the system and confirm the discharge point moves water to the correct outlet

A professionally installed system meets Austin Watershed Protection Department rules, Austin Development Services permit requirements, and TCEQ stormwater discharge regulations. DIY projects frequently violate all three.

How Long Does a Professional Drainage System Last?

  DIY Drainage Fix Professional Installation
Upfront cost $500–$1,500 $1,500–$5,000
Expected lifespan 1–2 seasons 20–40 years
Rework and removal cost when it fails $3,000–$5,000 N/A
Foundation damage risk High (in Austin clay) Eliminated with proper design
Potential foundation repair cost $8,000–$15,000+ $0
Insurance coverage for failure Typically excluded N/A
Code compliance Often violated Designed to comply

Signs Your Yard Needs Professional Drainage Help

Water pooling within 10 feet of your foundation or persisting more than 48 hours after rain: In Austin clay, water held this close to your foundation is already activating the swell-shrink cycle that causes structural damage.

Spongy turf that stays wet for days: Ground that remains saturated long after a storm indicates subsurface water has nowhere to go.

Visible soil erosion or exposed tree roots: Topsoil washing away means water is moving across the surface with enough velocity to strip it.

Water stains, mold, or musty odor in a basement or crawlspace: Surface drainage failure has already become a structural intrusion problem.

Cracks in the foundation: Unresolved drainage will widen those cracks with every storm.

Gutters overflowing or downspouts discharging at the foundation: The single most common cause of residential drainage problems is water from the roof depositing directly at the foundation.

A previous DIY drainage fix that has already failed: A system that failed once will fail again unless the underlying design problem is corrected by a professional.

Can Poor Drainage Cause Foundation Damage in Austin?

Yes. Austin’s Blackland Prairie clay makes this risk higher than in most U.S. cities. The same soil that holds water against your foundation swells when saturated and contracts when dry, applying and releasing lateral pressure on your foundation walls with every weather cycle.

A DIY trench in clay that lacks proper slope becomes a lateral water channel. As it fills, the surrounding clay saturates, swells, and presses against your foundation wall. Instead of solving the drainage problem, the trench creates a new one: a concentrated moisture source sitting directly against the structure it was supposed to protect. Even in a properly graded yard without a functioning drainage system, Austin clay runs this cycle with every rain. The foundation shifts into the gaps left by contracting soil. Over seasons, this accumulation of micro-movements produces the cracks, settling, and structural misalignment that define Austin foundation damage.

Foundation repair in Austin runs $8,000 to $15,000 or more. Most homeowner’s insurance policies exclude foundation damage caused by drainage issues, meaning you carry the full repair cost plus the cost of correcting the drainage situation. Once the foundation has moved, you’re no longer just paying for drainage.

When Should I Call a Drainage Professional Instead of Trying a DIY Fix?

Extending a downspout, clearing a clogged surface grate, or redirecting a single gutter are homeowner-appropriate fixes. Everything else in Austin should be evaluated by a professional before any digging begins.

Homeowner-Manageable Requires a Professional
Extending a gutter downspout 4–6 feet from the foundation Standing water within 10 feet of the foundation
Clearing debris from a surface drain or catch basin grate Visible foundation cracks or settling
Adjusting a splash block or downspout extender Soil erosion that has changed yard grade
Redirecting a single gutter discharge A previous DIY drainage fix that has already failed
  Water intrusion into a basement or crawlspace
  Yard that floods with every significant rain event
  Any situation requiring trenching

In Austin’s Blackland Prairie clay, the threshold for calling a professional is lower than in other cities. By the time damage is visible, it has usually been accumulating for seasons.

If you’re seeing standing water, foundation cracks, or soggy turf that won’t dry out, don’t risk a DIY fix that could make it worse. Call Sprinkler & Landscape Medics of Austin today at 512-710-7274 or reach out online to schedule your free consultation.
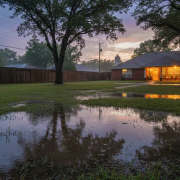
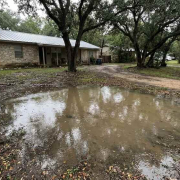
drainage problems Austin yards

Three Common Drainage Problems in Austin Yards

Austin yards face three drainage problems more than any others: standing water caused by clay soil that cannot absorb rainfall fast enough, improper yard grading that directs water toward your foundation instead of away from it, and overwhelmed or disconnected gutter downspouts that dump concentrated roof runoff against your slab. The corresponding solutions are French drain installation to collect and redirect subsurface water, professional re-grading to restore proper slope away from your foundation, and downspout extensions with underground piping to carry roof runoff safely away from your home.

Why Drainage Problems Are So Common in Austin

Austin’s soil and substrate conditions make yard drainage failures predictable without proper design. Houston Black Clay covers most of East and South Austin, absorbing water so slowly that even moderate rainfall pools on the surface for days. Central Texas flash-flood rainfall patterns compound the problem — storms regularly deliver 2–4 inches of rain within a single hour, a volume that would overwhelm drainage systems built for more gradual rainfall even if the soil drained perfectly.

Clay swells when wet and shrinks when dry. That repeated expansion-and-contraction cycle prevents surface drainage and puts structural pressure against anything it surrounds, including your foundation. Saturated clay presses against your slab and exerts hydrostatic pressure, the force of trapped water pushing against a structure. Over time, that pressure causes cracking, settling, and heaving that no interior repair will permanently fix without addressing the drainage source.

In Westlake, Circle C, and Northwest Hills, rocky limestone substrate replaces clay as the primary problem. That substrate drains quickly on the surface but offers almost no depth for water to percolate downward, so runoff moves laterally and collects at every low point in your yard. Many older Austin homes predate consistent enforcement of modern drainage standards. FEMA data puts approximately $25,000 in damage per inch of floodwater entering a home, which puts a professional drainage assessment in perspective.

Why Sprinkler & Landscape Medics for Drainage Solutions in Austin

Fixing Austin drainage problems requires a contractor who understands both local soil conditions and how irrigation systems interact with drainage, and that is exactly what we do.

We are a veteran-owned, Marine-founded irrigation and landscaping company serving Central Texas. Our team is NDS-certified in drainage contracting. We’ve worked on more than 1,000 Austin-area properties, and our 4.9-star Google rating across 147+ reviews consistently points to professionalism and honest pricing. A portion of every service goes back into the Austin community. We offer seasonal membership plans for year-round irrigation and drainage monitoring. We serve Austin, Cedar Park, Round Rock, Georgetown, Pflugerville, Leander, Hutto, Liberty Hill, Manor, Taylor, and Jarrell.

What Does NDS-Certified Mean for Drainage Installation?

NDS (National Diversified Sales) is the largest U.S. manufacturer of drainage products, including French drains, channel drains, and catch basins. As NDS-certified contractors, we follow manufacturer-specified design and installation methods, meaning the system is built to documented performance standards rather than general contractor approximations. In Central Texas clay soils and flash-flood conditions, that precision is the difference between a drain that holds up and one that fails in its first heavy rain.

Problem One: Standing Water and Soggy Spots From Clay Soil

Houston Black Clay acts like a bathtub when saturated. The soil cannot absorb water at the rate Austin storms deliver it, and pooling persists for days after the rain stops.

Warning signs to watch for:

  • Puddles that linger more than 24 hours after rain — your soil has already hit capacity
  • Mushy or spongy areas in the lawn that squelch underfoot — the ground is saturated below the surface
  • Grass dying in low spots — waterlogged roots cannot survive extended saturation
  • Increasing mosquito activity near your home — standing water is an active breeding environment

If you ignore standing water, the consequences go well beyond a soggy lawn. Waterlogged turf kills your grass roots from the bottom up. One inch of standing water is all mosquitoes need to complete their breeding cycle. In an Austin summer, a yard that stays wet for 48 hours becomes a breeding ground within the week. Prolonged saturation causes root rot in your trees and shrubs, including drought-tolerant native oaks.

Solutions for standing water:

  • French drain installation to collect and redirect subsurface water away from problem areas
  • Soil amendment with organic matter to improve percolation in clay-heavy areas over time
  • Dry well installation for properties where redirecting water to another part of the yard or off the property is not practical

Problem Two: Improper Yard Grading Directing Water Toward the Foundation

If the ground around your home slopes toward your foundation instead of away from it, you have a negative grading problem, and every rain event sends water straight toward your slab. IRC Section R401.3, Austin’s residential grading standard, requires at least 6 inches of drop within the first 10 feet of your foundation. Many older Austin homes predate consistent enforcement of that standard, and their yards still carry the original grading that directs rainfall straight toward the slab.

Warning signs of a grading problem:

  • Water pooling against your foundation after rain — the slope is directing runoff toward your home rather than away from it
  • Visible erosion along the slab line — water is moving along your foundation consistently
  • Cracks appearing in brick or drywall at door and window corners — foundation movement is underway
  • Doors that stick or will not close properly after heavy rains — your foundation is shifting under hydrostatic pressure

When the clay soil against your foundation becomes saturated repeatedly, it swells against your slab and builds hydrostatic pressure. That is the same mechanism that causes standing water damage, now focused directly on your foundation. That repeated pressure causes the foundation to crack, settle, and heave unevenly. Foundation repair in Austin typically costs $5,000 to $15,000 or more. Proper grading costs a fraction of that.

Solutions for grading problems:

  • Professional re-grading to restore the slope required by the code requirement away from your foundation
  • Channel drain installation along the foundation perimeter to intercept surface water before it reaches the slab
  • Swale construction to redirect surface runoff across the yard and away from the structure
  • Retaining walls for sloped properties, particularly relevant in Westlake and Northwest Austin where the terrain creates natural negative-grade conditions
  • Full landscaping and re-grading services are available through Sprinkler & Landscape Medics for properties that need comprehensive correction

Problem Three: Overwhelmed or Disconnected Gutter Downspouts

Your downspouts may be the source of the problem even if your gutters are clean and fully functional. A 2,000-square-foot roof sheds over 1,200 gallons during a single 1-inch rainfall, all of it exiting through your downspouts. Where that water goes from there determines whether your foundation stays dry or takes the hit.

Warning signs of a downspout problem:

  • Visible erosion or soil washout under gutter lines after rain — your downspouts are discharging more water than the soil can absorb at that point
  • Water stains on your foundation at downspout discharge points — concentrated runoff is reaching your slab consistently
  • Mulch washing away from beds near the house — discharge force is too high and too close to the structure
  • Basement or crawl space moisture following heavy rain — subsurface water is reaching below-grade areas

Fall is the hardest season for your gutters in Austin. Live oaks and pecans shed heavily in October and November, and gutters that were clear in September can be fully blocked by the first significant fall rain. That blockage sends roof runoff straight over the gutter edge and down against your foundation.

Solutions for downspout drainage failures:

  • Downspout extensions of 5 to 10 feet minimum from the foundation as a baseline correction
  • Underground piping to emitters positioned in the lawn away from the foundation for long-term reliability
  • Connection to an existing French drain system for comprehensive coverage across the drainage zone
  • Rain barrel or cistern collection, which some Austin neighborhoods require as part of their stormwater management approach

When to Call a Drainage Professional in Austin

Some drainage problems are DIY territory. These are not.

Red flags that require professional assessment:

  • Water reaching within 6 inches of your foundation after rain — you are one heavy storm away from structural contact
  • New or widening cracks in the foundation, brick, or drywall — movement is already underway
  • Water entering your home through the slab or walls — the drainage failure has breached your structure
  • Soggy areas persisting more than 48 hours after rain stops — your soil is no longer recovering between events
  • Your neighbor’s runoff draining onto your property — the source is outside your yard and requires professional evaluation

Ready for reliable drainage service from a veteran-owned team you can trust? Call Sprinkler & Landscape Medics of Austin today at 512-710-7274 or reach out online to schedule your free consultation.
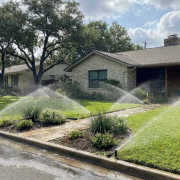
yard drainage issues after storm

How to Identify Yard Drainage Issues After a Storm

If your yard isn’t draining after a storm, here’s what to look for. Austin’s Blackland Prairie clay soil east of I-35 and the rocky Edwards Plateau limestone terrain to the west create conditions that turn a hard rain into a drainage problem fast. If these signs keep showing up after every storm, call us — we’ll tell you exactly what’s causing it.

What to Look for in Your Yard After a Storm

Here’s what to look for when you walk your property after the storm.

  • Standing Water and Puddles: If water pools in the same low spots after every storm, your soil can’t absorb or drain it fast enough. It creates conditions for mosquito breeding and can saturate root zones to the point of causing root rot in nearby plants and turf.
  • Soggy or Spongy Turf: If your lawn feels soft and waterlogged underfoot well after the rain has stopped, the soil below is holding more moisture than it should. Waterlogged soil squeezes oxygen out of your root zone, stressing your turf and leaving it vulnerable to fungal disease.
  • Soil Erosion and Gullies: If you see channels or gullies forming in your lawn after heavy rain, water is moving too fast across the surface and taking your soil with it. That erosion reshapes your yard’s grade and can expose root systems and irrigation lines.
  • Water Pooling Near the Foundation: Water collecting against your foundation is the most urgent sign on this list. Hydrostatic pressure from saturated soil pushes against foundation walls and can cause cracking and settling. A French drain is one of the most effective ways to redirect that water before it reaches your foundation.
  • Gutter Overflow and Downspout Problems: If your gutters are spilling over during a moderate rain or your downspouts are discharging directly against the foundation, the problem isn’t just the gutters. Without proper extensions or drainage to move water away from the house, it pools against your foundation.
  • Foul Odors and Mosquitoes: If your yard pools consistently after rain, you’re creating a prime mosquito breeding environment. If you’re noticing both standing water and foul odors, the water isn’t draining within a healthy timeframe.
  • Dying or Yellowing Plants: If your plants or turf are yellowing in areas that stay wet after rain, that’s often early-stage root rot. Check whether the affected areas are the same spots where water pools after rain.

Water should drain from your yard within 24 to 48 hours after a storm. If it’s still sitting after that window, you have a drainage problem.

Why Pick Sprinkler & Landscape Medics as Your Drainage Solution Partner in Austin

  • Veteran-Owned: We’re a veteran-owned company, and we bring the same attention to detail and follow-through to your drainage project that military service demands. We diagnose before we recommend, and we don’t cut corners on installation.
  • Giving Back: A portion of every job goes back into the Austin community, because taking care of this city means more than just solving drainage problems.
  • NDS Certified: Our team holds NDS certification in drainage system design, installation, and maintenance. That means we’ve been trained to properly design and install drainage systems according to established engineering and performance standards, not just dig a trench and lay pipe. For a homeowner hiring a drainage contractor, it’s the clearest sign the person knows what they’re doing — and it’s especially relevant in Austin, where clay soil, limestone terrain, and flash flood conditions create drainage challenges that generic installation experience isn’t equipped to handle.
  • 9 Stars on Google: We hold a 4.9-star rating on Google. Homeowners across Austin consistently tell us we delivered exactly what they needed.
  • Free Estimates: We offer free estimates so you know exactly what the problem is and what it costs to fix before any work begins.

When you’re ready, call us at 512-710-7274.

Why Austin Yards Are Especially Prone to Drainage Problems

Austin’s drainage challenges come directly from the region’s geology and climate.

To the west of I-35, Austin sits on the Edwards Plateau, a limestone-dominated terrain with thin, rocky soil and very low water retention. When rain falls on the plateau, it moves quickly across the surface because the underlying rock doesn’t absorb it. That runoff concentrates in low points and pools on flat lots without a drainage system in place.

East of I-35, the geology shifts to the Blackland Prairie, where the defining feature is expansive clay soil. Blackland Prairie clay swells when saturated and shrinks and cracks as it dries. During a storm, that clay absorbs water slowly and resists drainage, creating waterlogged, pooling conditions.

Austin also sits within what the Lower Colorado River Authority identifies as Flash Flood Alley. Storm systems here can dump several inches in a matter of hours. That kind of intensity exposes every flaw in your yard’s drainage fast.

The City of Austin Watershed Protection Department manages more than 1,100 miles of storm drain infrastructure across the city, much of it built for lower-density neighborhoods than what exists today. As Austin has grown and impervious cover has expanded, older systems are handling runoff volumes far beyond what their designers intended.

Common Causes of Yard Drainage Problems in Austin

Beyond geology and infrastructure, most drainage problems on individual Austin properties trace back to one or more specific on-site conditions.

  • Improper Yard Grading: Your yard should drop at least an inch per foot moving away from your foundation. When grading is flat, reversed, or settled unevenly, water moves toward the foundation instead of away from it. This is common in older properties where soil has settled and the original slope has flattened or reversed.
  • Compacted Soil: Foot traffic, heavy equipment, and years of vehicle parking compact clay soil until it can barely absorb water. The soil becomes so compacted it can’t absorb even moderate rainfall, producing surface pooling. Mulching protects soil from erosion, reduces surface compaction, and helps retain moisture in the root zone.
  • Clogged or Undersized Gutters and Downspouts: Roof runoff deposited against your foundation is one of the most damaging things a gutter system can do. When gutters back up or downspouts discharge against the foundation, water pools against your foundation. This is one of the most common contributors to foundation-adjacent pooling after rain in Austin.
  • Missing or Failing Drainage Systems: Many Austin properties simply don’t have any designed drainage system in place. Others have French drains or catch basins that have failed due to root intrusion, sediment buildup, or pipe collapse. Either way, water has nowhere to go.
  • Hardscape Changes: When you add hardscape without a drainage plan, that runoff ends up against your foundation or pooling in adjacent lawn areas. Patios, driveways, and walkways replace permeable ground with surfaces that shed runoff entirely, and without a drainage plan that water has to go somewhere.
  • Disconnected or Damaged Drain Pipes: Pipes that have separated, cracked from root intrusion, or collapsed from soil movement can look fine from the surface but be completely failed underground. Water entering a damaged drain either discharges in the wrong place or backs up entirely.

Drainage Solutions That Work for Austin Properties

  • French Drains: We install a perforated pipe in a gravel trench that collects subsurface water and redirects it away from problem areas. French drains are particularly effective for foundation-adjacent pooling and yards with persistent saturation in low-lying areas. For clay-heavy soils, combining a French drain with yard regrading gives you the most complete fix — the drain intercepts subsurface water before the clay saturates, and regrading controls where surface runoff goes before it has a chance to pool.
  • Yard Regrading: When the root cause is a flat or reverse-graded yard, regrading the soil to restore proper slope is the most direct fix. This involves moving soil to re-establish a grade that consistently directs sheet flow away from your house and toward appropriate discharge points.
  • Channel and Trench Drains: These surface drainage systems intercept sheet flow along driveways, patios, and walkways before it reaches the foundation or accumulates in adjacent lawn areas. They’re a practical solution anywhere water concentrates along a hardscape edge during a storm.
  • Dry Creek Beds: A dry creek bed manages surface runoff through a designed channel lined with river rock or gravel that guides water to a discharge point while adding a natural aesthetic element to the landscape. This works well where water has a visible path that just needs to be guided to a discharge point.
  • Downspout Extensions: When gutters are functioning but downspouts are discharging too close to the foundation, extending them to move water further into the yard or connecting them to an underground drainage line is often all that’s needed. It’s inexpensive and frequently overlooked.
  • Catch Basins: A catch basin is a surface-level inlet that collects water from a low point in your yard and routes it underground to a safe discharge point away from your home. It’s the right fix when one persistent low spot keeps pooling and regrading hasn’t solved it.
  • Aeration and Soil Amendment: Core aeration and compost topdressing improve your soil’s ability to absorb water over time. Combine it with sod installation to repair storm-damaged turf once drainage is corrected.
Solution Ideal Use Case Estimated Cost Range
French Drain Subsurface water saturation, foundation-adjacent pooling $$$
Yard Regrading Flat or reverse-graded yards, water flowing toward house $$$
Channel / Trench Drain Surface sheet flow along driveways, patios, walkways $ – $$
Dry Creek Bed Aesthetic solution for surface runoff channels $ – $$
Downspout Extension Water discharging close to foundation $
Catch Basin Low-point surface water collection $ – $$
Aeration + Soil Amendment Compacted clay-heavy soil with poor infiltration $


Frequently Asked Questions About Yard Drainage After a Storm

Can Yard Drainage Problems Damage My Foundation?

Yes. Water that consistently pools near your foundation creates hydrostatic pressure against foundation walls, which can cause cracking, settling, and structural movement. Foundation repairs in Texas range from approximately $5,000 to $30,000 or more depending on severity.

How Much Does It Cost to Fix Drainage Problems in a Yard?

The honest answer is it depends on the problem. A downspout extension or simple catch basin sits at the lower end of the range, while a full French drain system or yard regrading is a more substantial investment. Call us for a free estimate and we’ll give you a real number.

What Is a French Drain and Do I Need One?

A French drain is a subsurface drainage system made up of a perforated pipe set in a gravel trench that collects groundwater and redirects it away from problem areas. When we install your French drain, we design it for your specific soil conditions and drainage load. You likely need one if soil near your foundation stays saturated after rain, or if a section of your yard takes days to dry out after a storm.

How Do I Know if My Yard Needs Regrading?

Walk your yard after a heavy rain and watch where water goes. If it moves toward the house rather than away from it, your grade is either insufficient or reversed in that area. If the rain was too light to tell, we can survey your grade and give you a definitive answer.

Protect Your Austin Property With a Professional Drainage Assessment

Every storm that moves through Austin is a stress test for your yard, your foundation, and your landscaping investment. Recurring drainage problems only get more expensive to ignore. We bring NDS certification, veteran-owned values, and free estimates to every project, from a single catch basin installation to a complete French drain and regrading system. We’ve served more than 1,000 homes across Austin, Georgetown, Cedar Park, Round Rock, Pflugerville, Leander, Manor, Hutto, Liberty Hill, Taylor, and Jarrell.

Ready for reliable drainage service from a veteran-owned team you can trust? Call Sprinkler & Landscape Medics of Austin today at 512-710-7274 or reach out online to schedule your free consultation.
sprinkler layout update after landscaping changes

When to Update Your Sprinkler Layout After Landscaping Changes

You need to update your sprinkler layout any time a landscaping change alters where water should go. That means any time you add a patio, install a pool, plant trees, lay new sod, or expand garden beds. An irrigation layout calibrated for your old yard will overspray new hardscape, miss new plantings, and put you at risk of Austin Water violations.

Why Your Sprinkler System Needs to Change When Your Landscaping Does

Your irrigation system is calibrated for one specific layout. When your yard changes, that calibration breaks, and your system keeps running as if nothing changed. In Central Texas heat and drought, that doesn’t just waste water. It actively fails your lawn while running up your bill.

What you’re risking when you don’t update:

  • Your system sprays your new patio or driveway instead of your lawn. That’s wasted water.
  • Your new garden beds won’t get adequate water during the weeks they need it most. Heads calibrated for your old layout won’t reach new plantings.
  • Construction equipment crushes, clogs, or blocks heads installed near new work. These problems surface weeks later when your lawn shows the damage.
  • Your system runs longer to compensate, driving up your usage charges without improving your lawn. Misdirected water produces no benefit while adding to your bill.

Why Pick Sprinkler & Landscape Medics for Your Irrigation Reroute in Austin

We handle both the landscaping and the irrigation, so when your yard changes, we already know how it affects your system. In many cases, we did the landscaping too. Texas law requires a licensed irrigator for this work. Anyone rerouting your lines without that license is operating illegally, regardless of experience.

  • Veteran-owned and operated, Marine-founded, with veterans on staff
  • NDS-Certified Contractor (National Diversified Sales) for drainage and water management
  • More than 1,000 homes served across the Greater Austin metro
  • 9-star Google rating with over 147 reviews
  • Free installation estimates
  • Seasonal membership plans for ongoing irrigation maintenance

We serve homeowners across Travis County and Williamson County, including Cedar Park, Georgetown, Round Rock, Pflugerville, Leander, Hutto, Manor, Liberty Hill, Taylor, and Jarrell.

Common Landscaping Changes That Require a Sprinkler Update

Landscaping Change Irrigation Action Required
Patio, deck, or outdoor kitchen Relocate heads and reroute PVC lines out from under hardscape
Pool or spa installation Reroute lines before excavation; rebuild coverage post-construction
New garden or flower beds Convert spray heads to drip irrigation
New sod installation Recalibrate head heights to match new grade; adjust zones
New trees or large shrubs Add bubblers at root zones; plan for long-term canopy coverage changes
Fence, shed, or pergola Adjust spray patterns around new obstructions
Xeriscaping or rock replacement Cap unused zones; add drip for any remaining plantings
Driveway or sidewalk expansion Reroute lines before concrete pour

Do I Need to Move Sprinklers When Adding a Patio or Pool?

Yes. Any hardscape addition that covers or surrounds existing sprinkler heads or lines requires relocation before or immediately after construction is complete.

For patios and decks, heads that end up under a concrete slab can’t do their job, and any head adjacent to new hardscape will spray the paving instead of the lawn. We relocate those heads to the perimeter before the concrete is poured.

Pool and spa installations introduce a more serious risk. Your irrigation lines sit just 6 to 12 inches below the surface, well within range of the equipment used in pool construction. A crew excavating for a pool shell won’t check for irrigation lines along the way. We reroute those lines before excavation begins, protecting your existing system and keeping surprises off your construction budget.

Should I Switch to Drip Irrigation for New Garden Beds?

Yes. When you add garden or flower beds, switching those zones from spray heads to drip is the right move for your plants, your water bill, and your compliance with Austin’s watering restrictions.

  • It delivers water directly to the root zone, reducing fungal disease risk
  • It uses significantly less water, cutting evaporation loss in Central Texas heat
  • It keeps water off hardscape edges
  • It expands easily as beds grow over time
  • It qualifies for Austin Water rebate programs for water-efficient irrigation devices

Rain Bird and Hunter Industries both manufacture reliable drip systems widely used across Austin. For transitional zones where turf and bed areas overlap, MP Rotator nozzles and pressure-regulated heads reduce overspray without a full drip conversion.

How Does Planting New Trees Affect My Sprinkler Layout?

Planting new trees affects your sprinkler layout right now at the root zone, and over time as the canopy reshapes your yard’s sun and shade patterns.

Newly planted trees need water at the root zone, not broadcast across the surrounding turf. Standard spray heads can’t deliver the deep, targeted moisture young trees need to establish strong roots. Adding bubblers or a dedicated drip line at the root zone during planting gives the tree what it needs without overwatering the surrounding grass.

As live oaks and cedar elms mature, their canopy shades areas that were once in full sun, reducing irrigation demand across surrounding zones. If you don’t adjust your system as the canopy grows, it keeps running the same schedule long after those zones need less water. Plan for canopy growth when the tree goes in, not after your water bill climbs and you’re not sure why.

What Does a Sprinkler Reroute or Redesign Involve?

Texas law requires a licensed irrigator for all irrigation work. The process follows a defined sequence.

  • System assessment: Locate and map all existing lines, heads, valves, and control wires
  • New landscape mapping: Overlay the updated landscape design against current zones to identify conflicts and coverage gaps
  • Reroute design: Plan new head placement, line routing, and zone configuration
  • Physical reroute: Relocate heads, reroute PVC lateral and main lines, cap unused lines, and move valves as needed
  • Zone conversion: Add new zones or convert spray zones to drip where applicable
  • Controller reprogramming: We reprogram your controller with the new zone map and a schedule that meets Austin Water’s current restrictions
  • System testing: Test for pressure, coverage, and functionality across all updated zones

Call us for a free estimate specific to your yard.

Should I Reroute Sprinklers Before or After Construction?

Complete hardscape construction first, then reroute the irrigation system, then lay new sod or install final plantings.

  • Phase 1: Complete hardscape work first. Heavy machinery will destroy relocated irrigation lines if the reroute happens too early.
  • Phase 2: Reroute the irrigation system. Once the final hardscape footprint is set, the layout can be designed around permanent features.
  • Phase 3: Install sod and final plantings last. Head heights are set to match finished grade, and zone calibration is done with the final landscape in place.

Your irrigation lines sit just 6 to 12 inches underground, directly in the path of construction equipment. Get the sequence right and you protect your system from the start.

How Much Does a Sprinkler Reroute Cost in Austin?

A sprinkler reroute in Austin typically costs between $250 and $1,500 or more. Your final cost depends on:

  • Number of irrigation zones affected
  • Linear footage of PVC lateral line being rerouted
  • Whether new zones are being added or existing zones reconfigured
  • Soil conditions: rocky Edwards Plateau soils west of I-35 require more labor-intensive trenching; Blackland Prairie clay east of I-35 demands precise head placement to avoid runoff
  • Any upgrades we add during the reroute

Austin Water offers rebates for qualifying upgrades, including pressure-reducing valves, smart controllers, and drip conversions, which can reduce your out-of-pocket cost. We identify rebate-eligible components during your free estimate.

Tips for Planning Your Irrigation and Landscaping Together

If your project is still in the planning stage, integrating irrigation from the start costs far less than retrofitting it after the fact. In Central Texas, where Austin Water Stage 2 restrictions limit automatic watering to one day per week, a well-planned system is not just convenient. It’s necessary.

  • Plan your irrigation layout and landscape design at the same time; changes cost far less before ground is broken
  • If you’re converting lawn to xeriscaping or rock, cap unnecessary zones and add drip only where plantings remain
  • Work with one company that handles both landscaping and irrigation; we do
  • Include a drainage assessment for projects that add significant hardscape; French drains are often part of the same scope
  • Upgrade to a smart controller during the renovation; it’s the most cost-efficient time to add one, and Austin Water rebates may apply
  • Schedule an annual irrigation audit with us after any yard modification; a seasonal maintenance membership keeps that on the calendar automatically

Should I Install Sprinklers Before or After New Sod?

Install the sprinkler system first. Always.

If sod goes down first, your heads end up buried or off-grade, and the only fix is digging back up and disturbing the sod you just paid to install. We put irrigation in first and sod second. Because we handle both scopes, both jobs are completed with the finished grade in mind from the start.

How Can a Smart Irrigation Controller Help After a Landscape Renovation?

A smart controller is one of the most practical upgrades you can make during a renovation, especially with Austin Water Stage 2 restrictions limiting you to one watering day per week.

  • Weather-based scheduling: adjusts run times automatically based on temperature, humidity, and rainfall
  • Flow sensors: detect leaks or broken lines and shut the system down before a small problem becomes a large bill
  • Rain and freeze sensors: pause the system during precipitation or freezing temperatures automatically
  • Remote access via app: adjust zones, check run history, and receive alerts from your phone

Rain Bird and Hunter Industries manufacture the most widely used smart controllers in the Austin market. Austin Water offers rebates for qualifying upgrades. Ask about eligibility when you call for your free estimate.

Planning a landscaping project or just finished one? Call Sprinkler & Landscape Medics of Austin today at 512-710-7274 or reach out online to schedule your free consultation. We’re a veteran-owned company serving Greater Austin, and a portion of every service goes back into the communities we work in.

mowing height watering needs Austin

How Mowing Height Affects Watering Needs in Austin

How tall you cut your grass directly determines how much water your lawn needs, and in Austin, where automatic irrigation is limited to one day per week, getting it wrong shows fast. Taller grass blades shade the soil surface, slow evaporation, and encourage roots to grow deeper where moisture stays available longer between waterings. Staying at the right height consistently is one of the easiest ways to keep your lawn healthy on one watering day a week.

The Connection Between Mowing Height and Water Needs

Austin’s summers routinely exceed 100°F, and that heat accelerates evapotranspiration (the combined loss of water through soil evaporation and plant transpiration) at a rate that closely mowed lawns simply can’t keep up with. Under Austin Water’s one-day-per-week automatic irrigation restriction, if your lawn dries out two days after watering, it spends five days under heat stress with no legal path to relief. Mowing height is one of the few things you control that directly extends how long your lawn stays hydrated after each watering session.

Taller grass also develops a more extensive root system. University of Missouri Extension research (G6720) found that lawns mowed at 3–3.5 inches survive prolonged drought significantly better, because more root depth means more access to subsurface moisture.

Why Sprinkler & Landscape Medics is Your Austin Irrigation and Lawn Care Partner

Mowing at the right height works best when your irrigation system is calibrated to match the root depth you’re building. A taller lawn with deeper roots needs water delivered deeper, less frequently, and timed to match your soil’s actual moisture-holding capacity. Together, they produce a lawn that stays green on one watering day a week.

We are a veteran-owned, Marine-founded irrigation and landscaping company serving Central Texas. Our team is NDS-certified in drainage contracting, meaning our recommendations account for how water actually moves through Austin’s clay and limestone soils. We’ve worked on more than 1,000 Central Texas lawns, and our 4.9-star rating across 147+ Google reviews consistently points to professionalism and honest pricing. A portion of every service goes back into the Austin community. We serve Austin, Cedar Park, Round Rock, Georgetown, Pflugerville, Leander, Hutto, Liberty Hill, Manor, Taylor, and Jarrell.

Our seasonal irrigation membership plans keep your system tuned through Austin’s seasonal shifts, so your mowing habits and irrigation schedule stay aligned.

Ideal Mowing Heights for Austin’s Most Common Warm-Season Grasses

Here are the right heights for Austin’s most common warm-season grasses and how each affects your watering needs.

Grass Type Recommended Range Summer Height Watering Impact
St. Augustine (Raleigh, Palmetto) 2.5–4 inches 3–3.5 inches Maximum soil shading; reduces evaporation significantly
Bermuda (Tifway 419, Common) 1–2.5 inches 1.5–2.5 inches Dense canopy at proper height; severe stress if cut below 1 inch
Zoysia (Palisades, Zeon) 1.5–2.5 inches 1.5–2 inches Dense, efficient canopy; holds moisture well once established
Buffalograss 3–4 inches (managed) 3–4 inches Native drought tolerance; lowest irrigation demand of the four

The One-Third Rule and Why It Matters for Irrigation

Never remove more than one-third of the grass blade’s total length in a single mowing session. Violating it stresses your grass in ways that directly increase irrigation demand.

When you remove more than one-third of the blade in one cut, your grass goes into recovery mode. The root system pays the price. Your grass pulls energy away from root development and redirects it toward regrowing the blades it just lost. Roots stop growing deeper and stay shallow, close to the surface where your grass is spending its recovery energy. Your lawn shows drought stress earlier in the week, and under Austin’s one-day restriction, you can’t simply water again. The result is a lawn that’s permanently more dependent on irrigation than it needs to be, not because of the grass type or the weather, but because of a mowing habit you can fix at no cost.

Here’s what that pattern costs in practical terms:

  • Shallow roots dry out faster between waterings, reducing the interval your irrigation system can cover.
  • Grass under constant recovery stress demands more frequent irrigation to maintain the appearance of health.
  • Damaged blade tips lose moisture faster than cleanly cut grass, accelerating surface-level evaporation.
  • A weakened root system becomes more vulnerable to Austin’s summer heat with each repeated violation.

Most warm-season grasses grow fast enough during May through September to require weekly mowing. Skipping a week typically means you can’t return to target height without removing more than one-third of the blade.

A sharp blade cuts cleanly through the grass tissue; a dull blade tears it. Sharpen your blades at least once mid-season. It takes 20 minutes and directly reduces how much water your lawn loses between sessions.

How Mowing Height Works With Austin’s Water Restrictions

You’re limited to one watering day per week, and mowing at the right height is one of the most effective ways to make it last. Mowing at the right height costs nothing and works with Austin’s restrictions, not around them.

Austin Water’s Conservation Stage restrictions limit automatic irrigation to one designated day per week, with sessions allowed only between midnight and 10 a.m. or between 7 p.m. and midnight.

When you cut your grass at the right height, the blades form a canopy over the soil surface. Deeper roots mean your lawn stays green longer after each watering than a closely cut lawn in the same conditions. Here’s how to put that into practice:

  • Adjust your mowing height by season: Raise your cutting height in summer, when heat stress and evaporation are at their peak, and lower it slightly in spring and fall when temperatures ease and root stress decreases.
  • Mulch clippings back onto the lawn: Returning clippings adds organic matter and retains surface moisture, reducing how much extra water your lawn needs between sessions.
  • Water deeply on your designated day: One thorough watering that saturates the root zone does more than multiple shallow sessions, and keeps you within Austin’s one-day limit while actually reaching the depth where deeper roots live.

Common Mowing Mistakes That Increase Watering Needs

A full grass canopy and deep roots are what keep your lawn g